
Claude and ChatGPT always use OAuth. Claude Code, Codex, Cursor, Gemini CLI, VS Code, and Windsurf support both, and you choose by what you put in their config file: leave the credential out and the client signs you in over OAuth, supply one and the client reaches the whole workspace. Antigravity is set up with a key; its OAuth support is not documented here. Both routes hit the same server and expose the same tools.
OAuth, scoped to you
The assistant acts as the person who approved the connection. Every tool call runs with that person’s permissions: lists and searches come back filtered to what they can see, and a client or project they cannot open is refused rather than returned. That makes OAuth the better fit whenever a real person is driving the assistant, because the blast radius of the connection is the same as the blast radius of that person’s account. There is nothing to create in NeetoInvoice beforehand. You give the client the server URL and it works out the rest on its own. The server publishes its OAuth metadata athttps://connect.neetoinvoice.com/.well-known/oauth-authorization-server, and registers each client automatically, so there is no client ID or secret for you to create.
Registration accepts loopback redirect URIs, the local callback address a terminal or editor client listens on. Claude Code, Codex, Cursor, Gemini CLI, VS Code, and Windsurf therefore complete the same browser sign in that Claude and ChatGPT do.
What you approve
The approval screen has a What this connection can do section. Reading and staying connected are always granted; creating and deleting are the two you choose.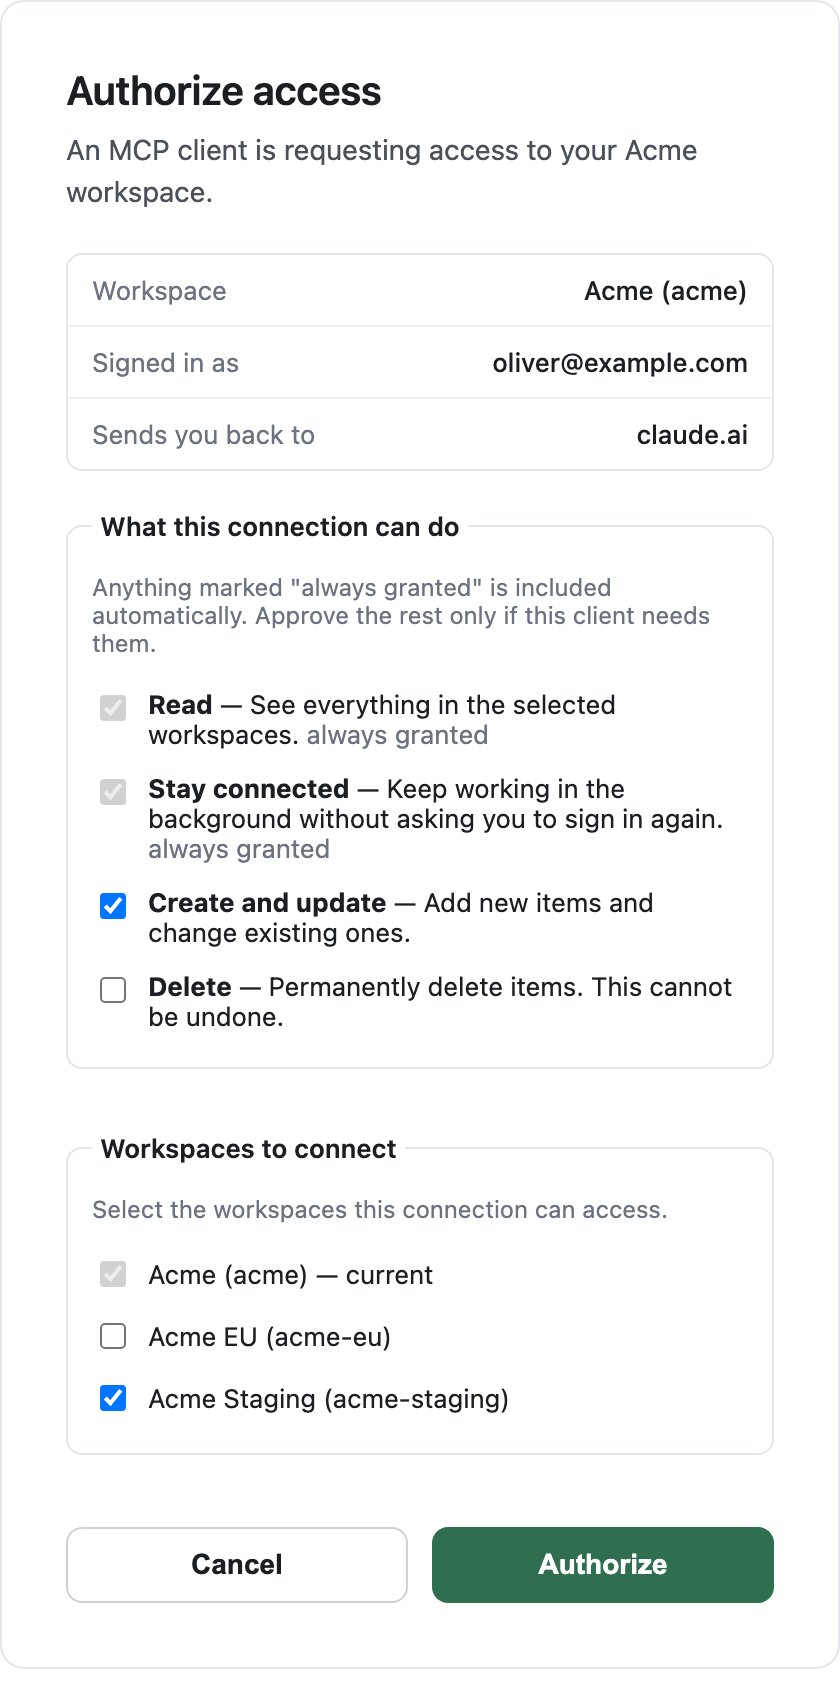
The approval screen, with the scope picker and the workspace list.
- Connect your workspace. Enter the subdomain of the workspace you want the assistant to reach. For
acme.neetoinvoice.com, enteracme. See Workspace subdomain.
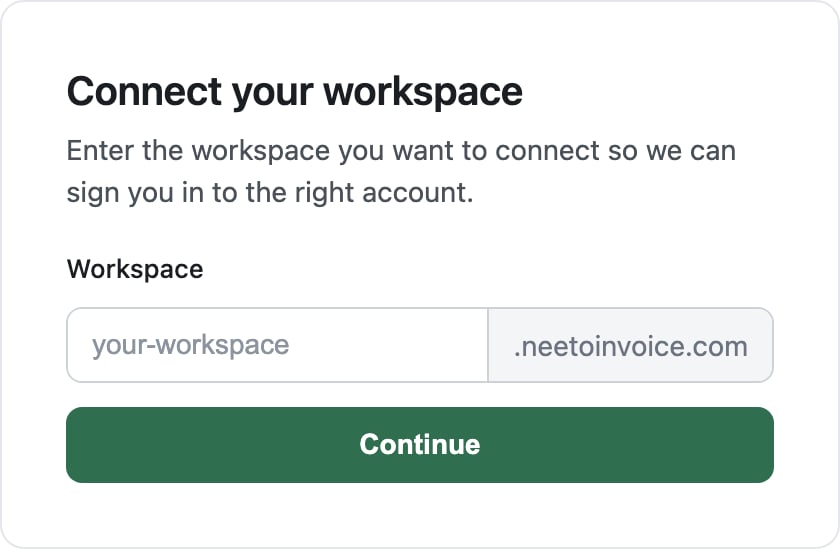
The first screen of the NeetoInvoice OAuth flow.
- Sign in to that workspace, if you are not signed in already.
- Check the approval screen. It names the workspace, the email you signed in as, and the host the client sends you back to, and it shows the scope picker above. When your email belongs to more than one workspace, it also lists them under Workspaces to connect; the one you signed in to is ticked and cannot be unticked.
- Authorize. The assistant is granted access as you, with the scopes you ticked, to each workspace you ticked.
workspace argument for this.